> ## Documentation Index
> Fetch the complete documentation index at: https://docs.promo.cv/llms.txt
> Use this file to discover all available pages before exploring further.
# Create a New Activation
> Step-by-step guide to creating and publishing activations from your agency dashboard
Activations are job postings that brand ambassadors can apply to. This guide walks you through creating and publishing a new activation from your agency dashboard.
## Prerequisites
* An active agency account with access to the dashboard
## Creating your activation
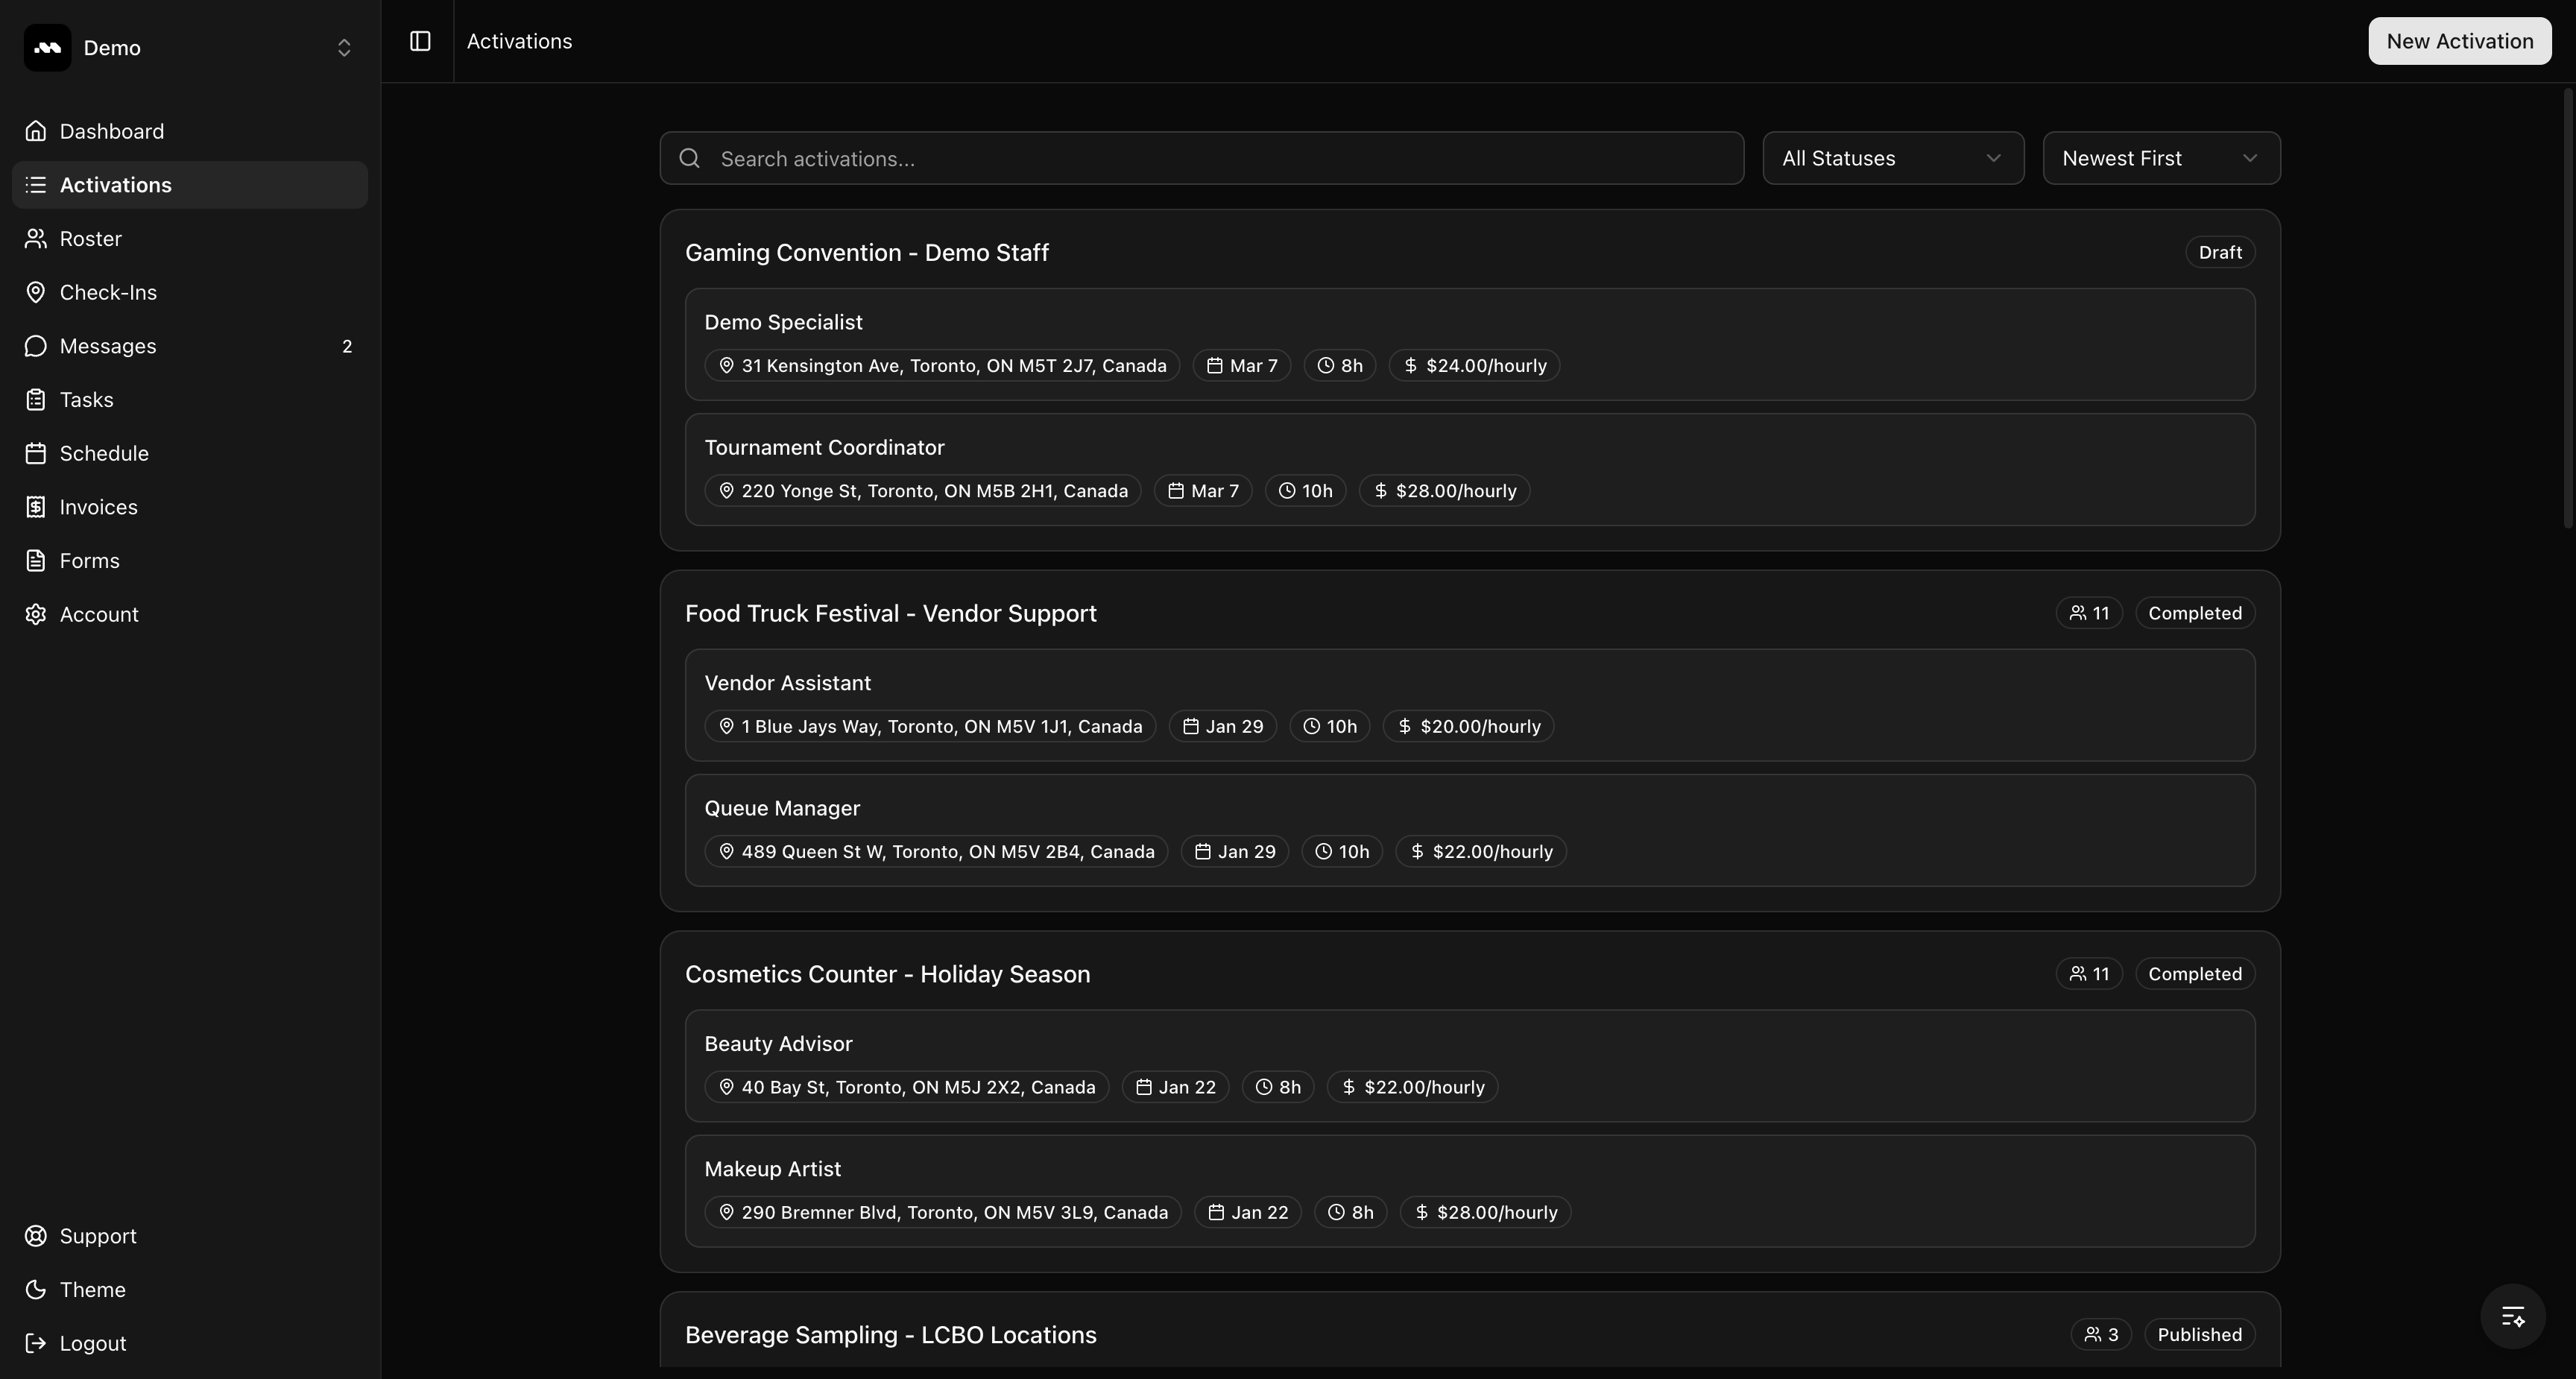
From your agency dashboard, click **Activations** in the sidebar. You'll see a list of all your current activations with their status (Draft, Published, Completed). Click the **New Activation** button in the top-right corner.
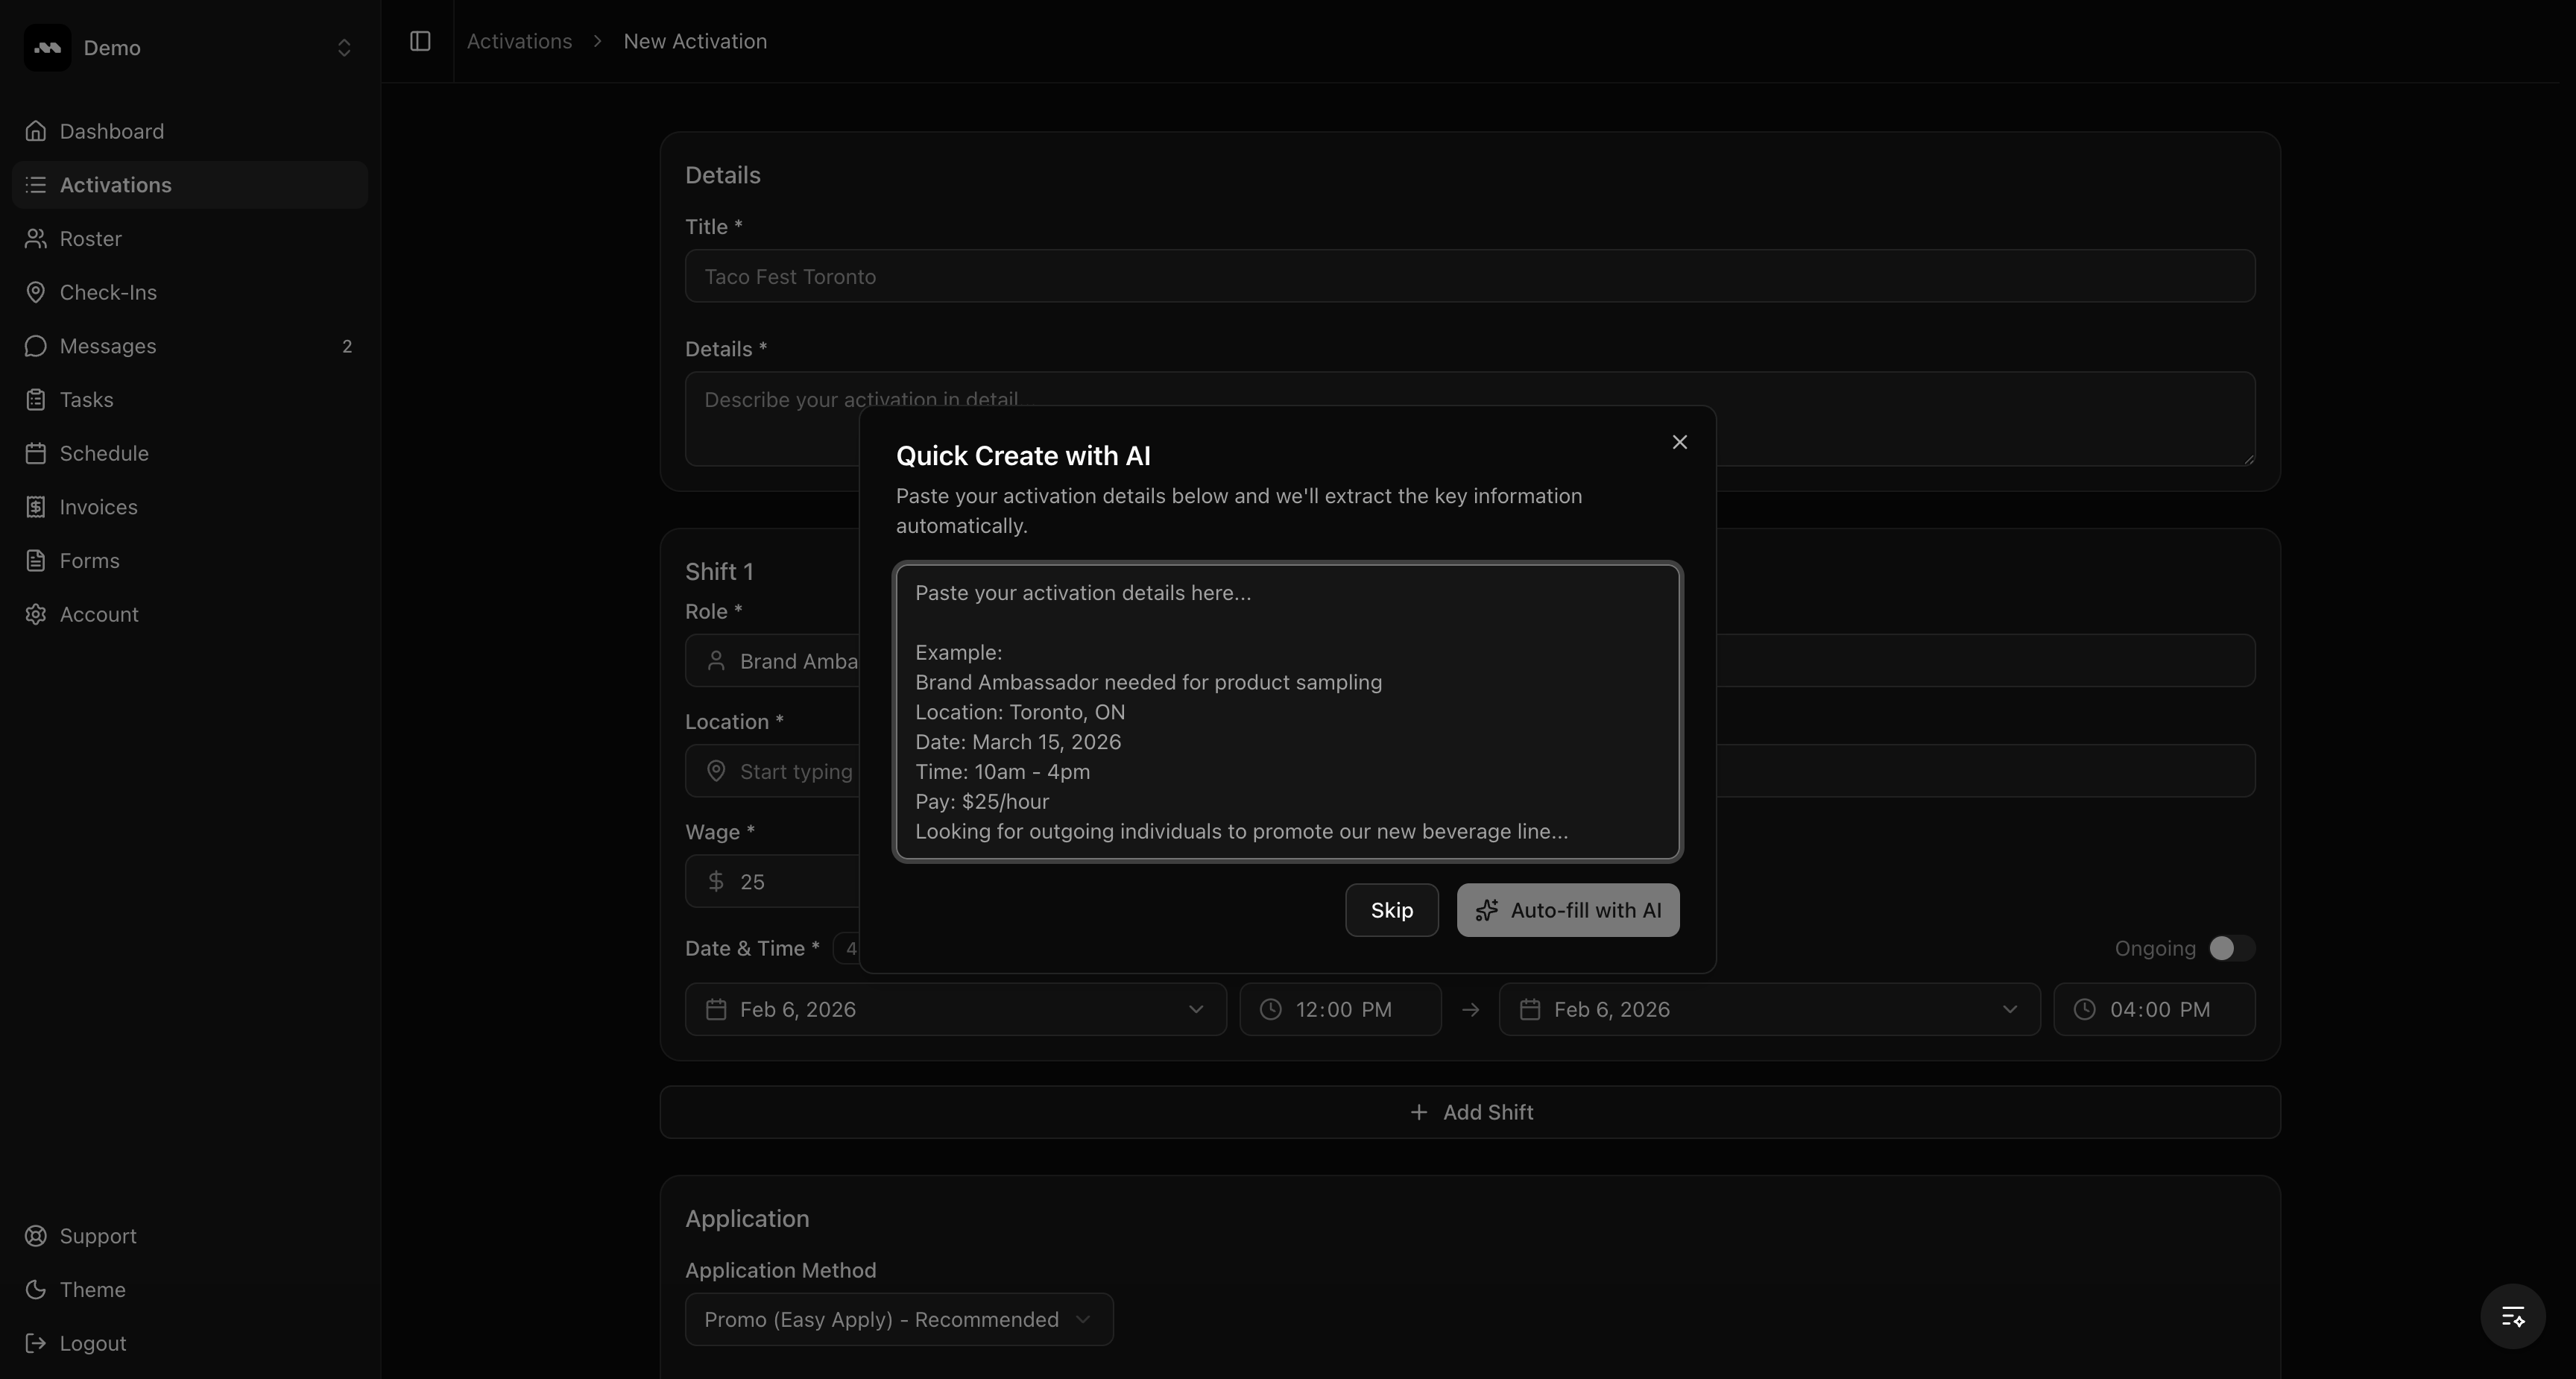
 When the page loads, a **Quick Create with AI** dialog appears. You can paste activation details (like a job description from an email or document) and click **Auto-fill with AI** to automatically extract the title, description, and shift details.
If you prefer to fill in the form manually, click **Skip**.
When the page loads, a **Quick Create with AI** dialog appears. You can paste activation details (like a job description from an email or document) and click **Auto-fill with AI** to automatically extract the title, description, and shift details.
If you prefer to fill in the form manually, click **Skip**.
 The Quick Create with AI feature works well when you have a job description from an email or document — just paste it in and let AI extract the details.
Enter a **Title** for your activation and a detailed **Description**. The title is what brand ambassadors will see when browsing opportunities, so make it descriptive and location-specific.
In the description, include what the role involves, any requirements, and what training will be provided.
The Quick Create with AI feature works well when you have a job description from an email or document — just paste it in and let AI extract the details.
Enter a **Title** for your activation and a detailed **Description**. The title is what brand ambassadors will see when browsing opportunities, so make it descriptive and location-specific.
In the description, include what the role involves, any requirements, and what training will be provided.
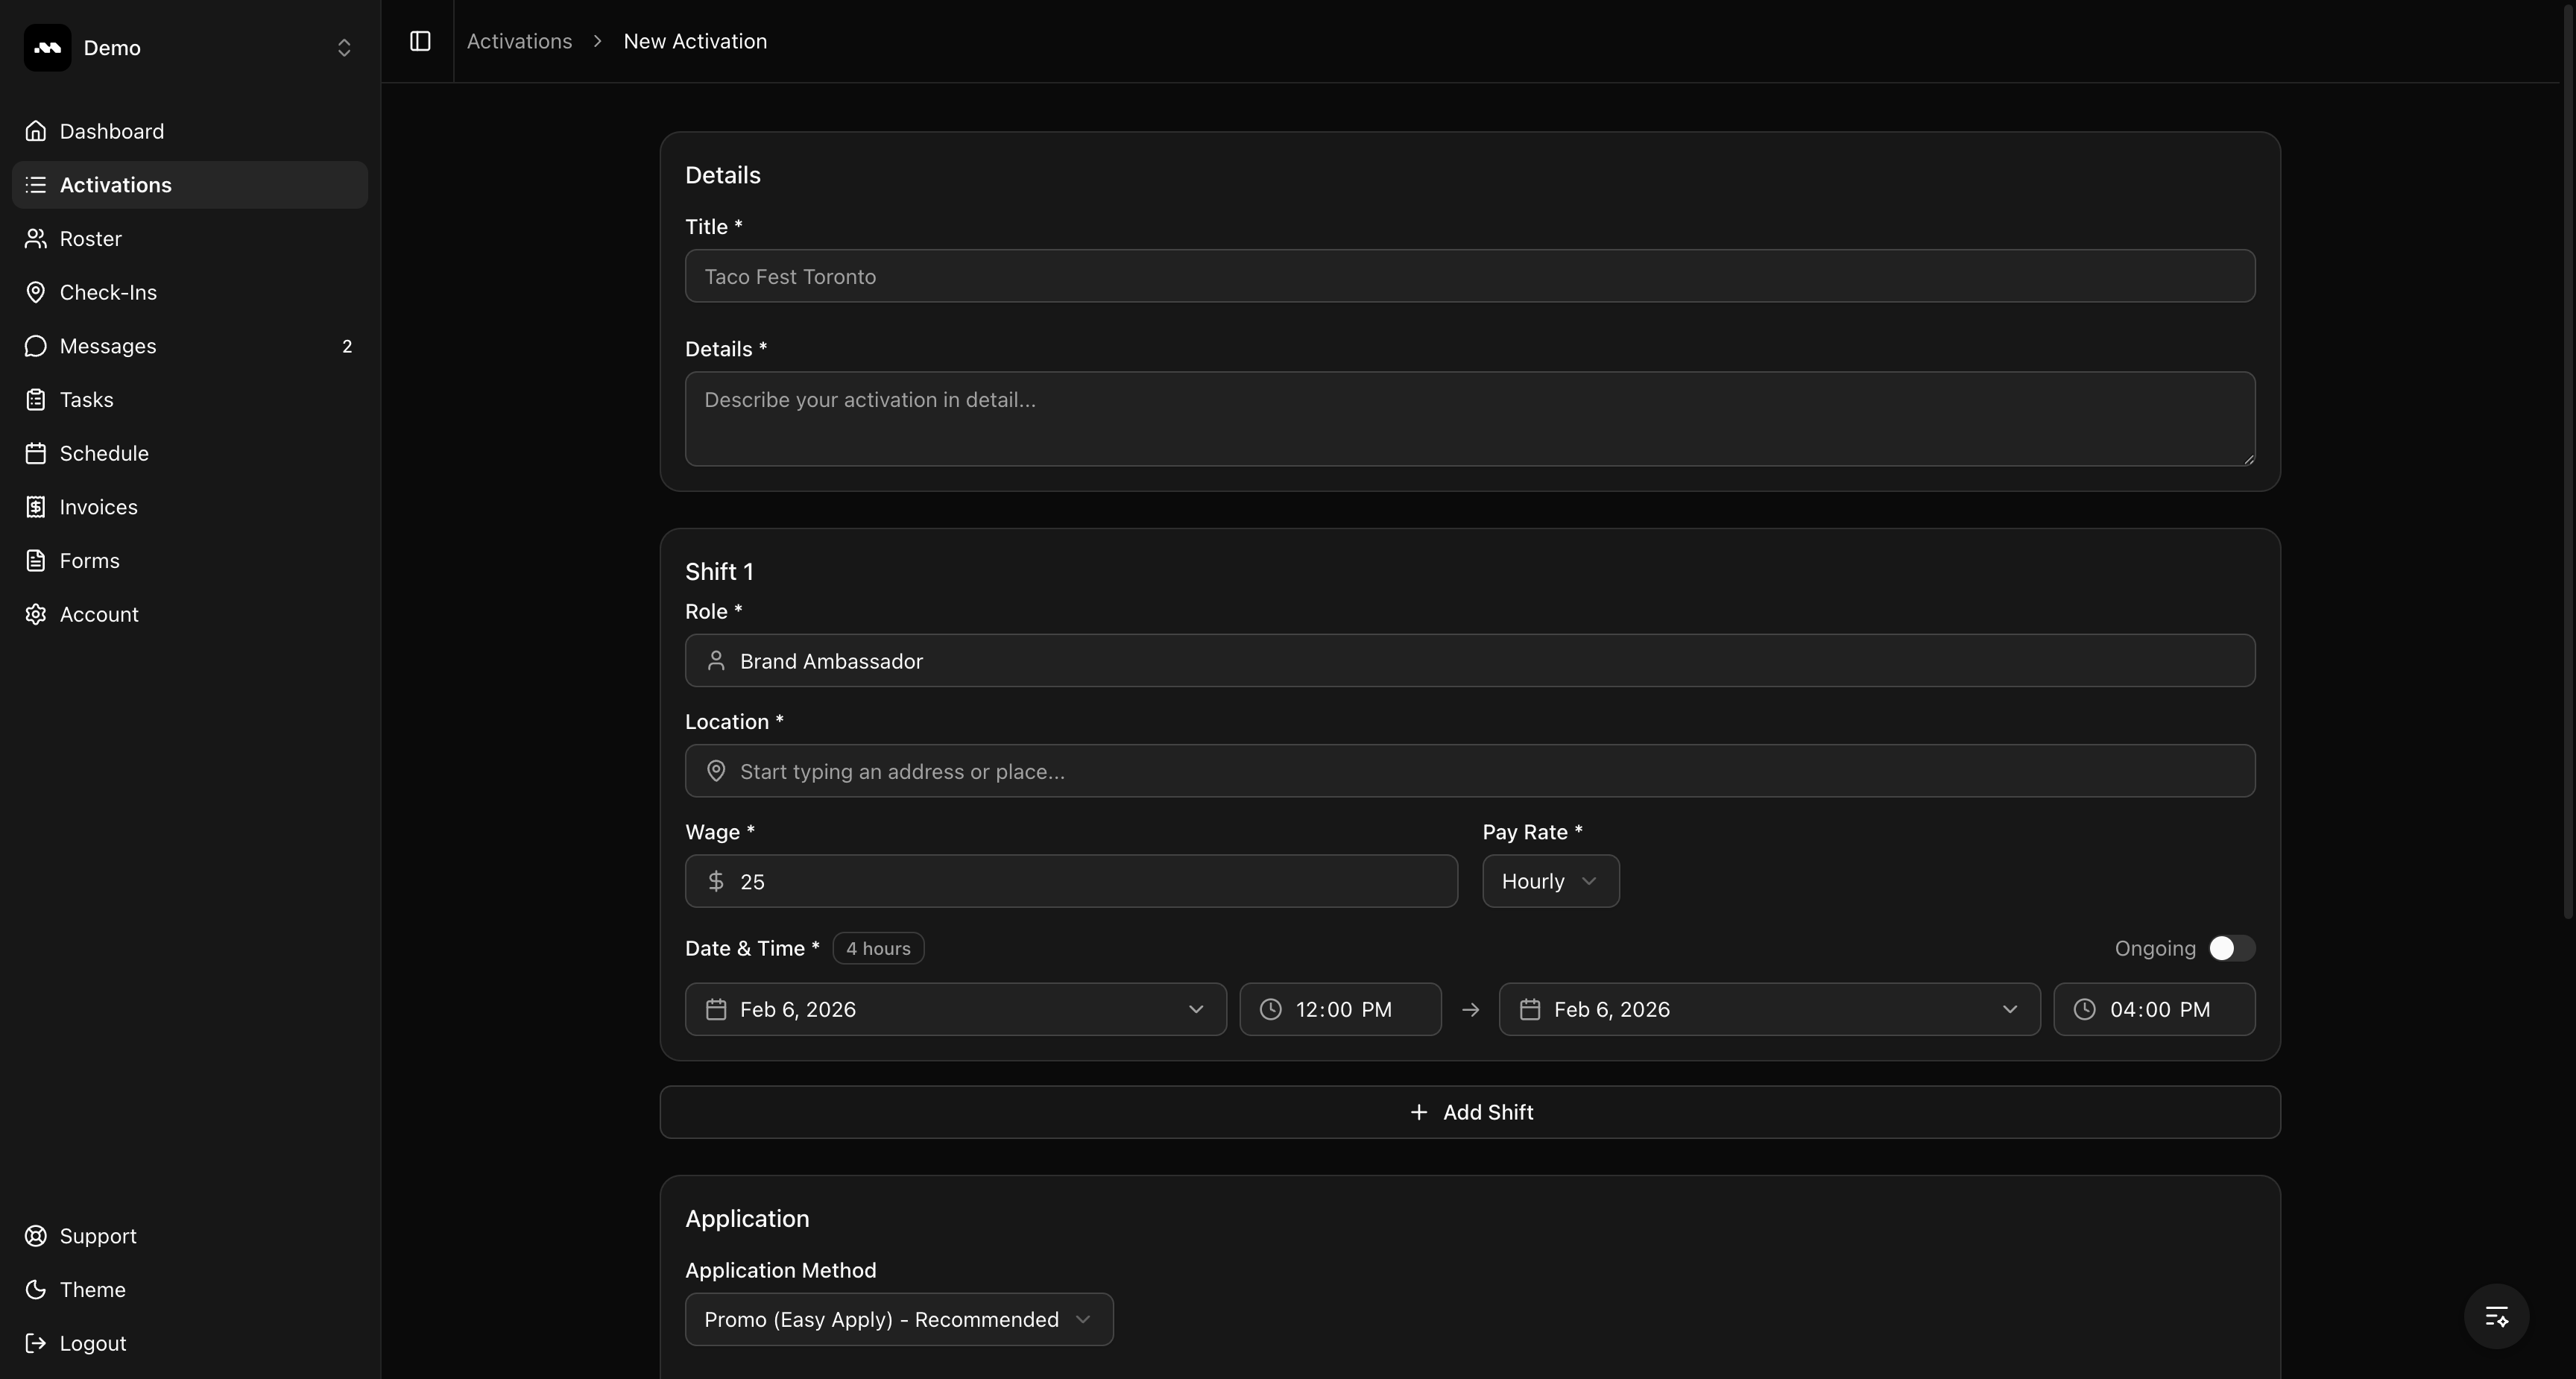 Fill in the title and a clear description of the opportunity. Be specific about what the role involves so applicants know what to expect.
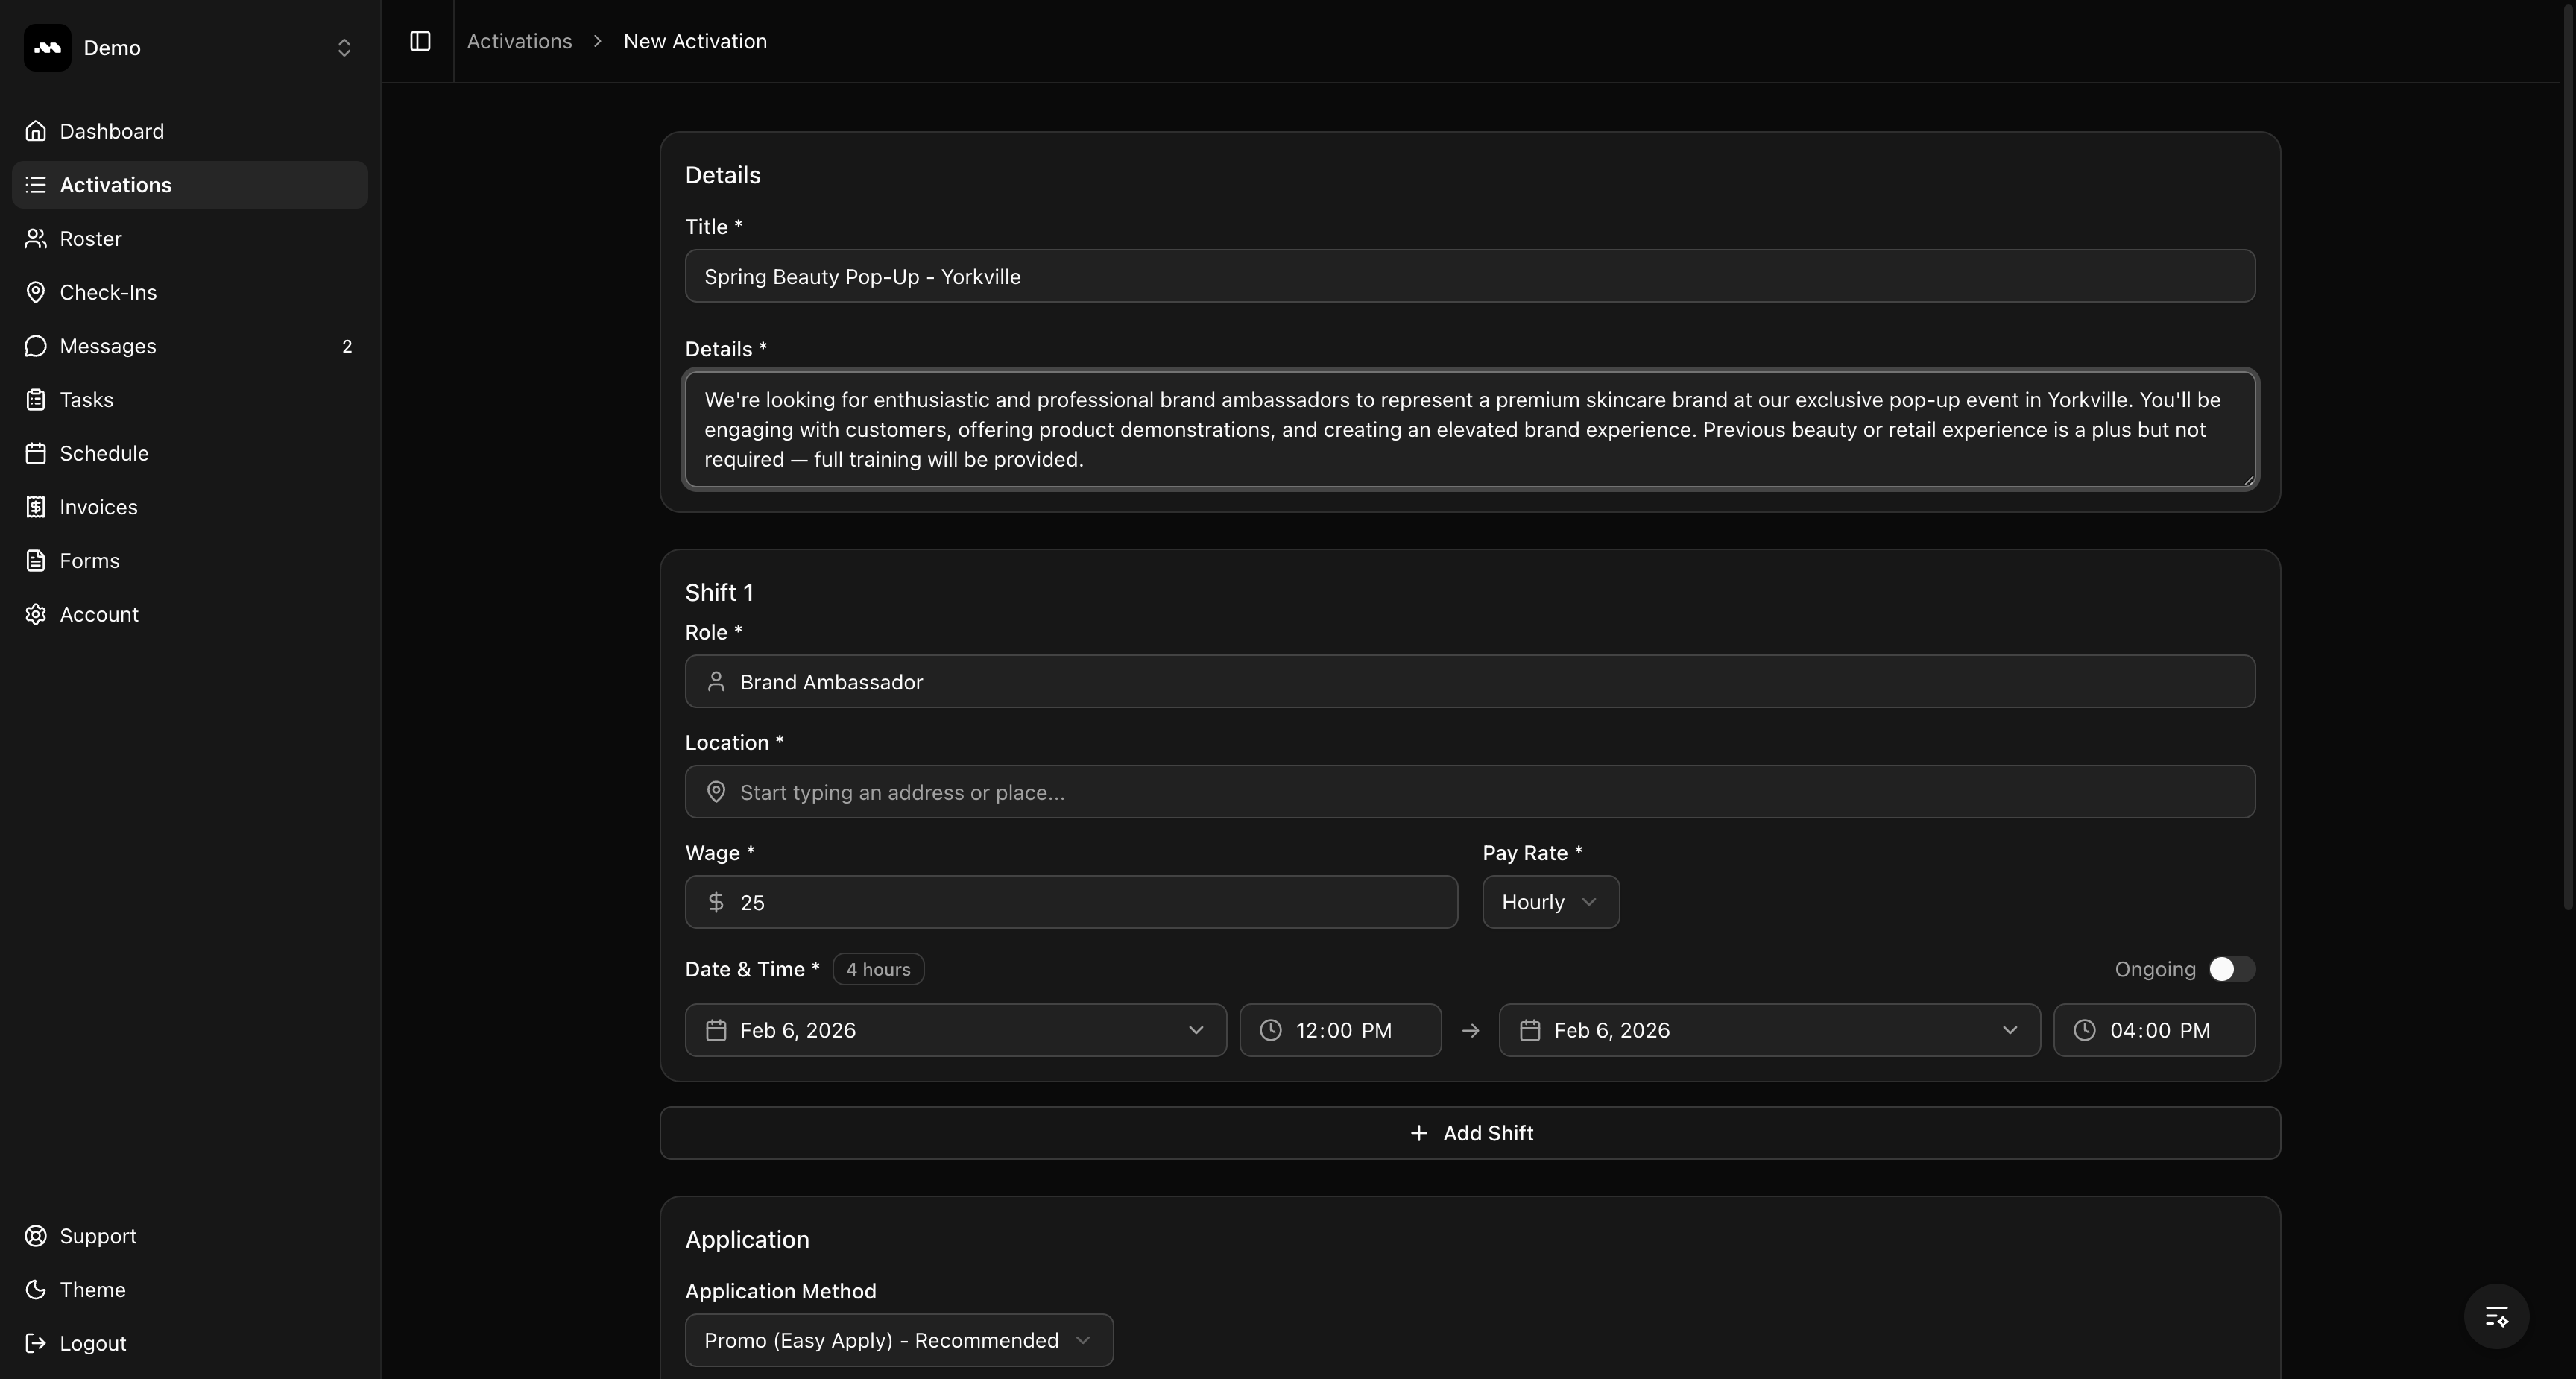 Each activation needs at least one shift. Fill in the shift details:
* **Role** — The job title for this shift (e.g., "Beauty Ambassador", "Sampling Specialist")
* **Location** — Start typing an address and select from the suggestions. A map preview will confirm the location.
* **Wage** — The pay amount for this shift
* **Pay Rate** — Choose between Hourly, Daily, Flat, or Per Visit
* **Date & Time** — Set the start and end date/time for the shift. Toggle **Ongoing** if there's no fixed end date.
You can add more shifts by clicking **+ Add Shift** at the bottom of the section.
Each activation needs at least one shift. Fill in the shift details:
* **Role** — The job title for this shift (e.g., "Beauty Ambassador", "Sampling Specialist")
* **Location** — Start typing an address and select from the suggestions. A map preview will confirm the location.
* **Wage** — The pay amount for this shift
* **Pay Rate** — Choose between Hourly, Daily, Flat, or Per Visit
* **Date & Time** — Set the start and end date/time for the shift. Toggle **Ongoing** if there's no fixed end date.
You can add more shifts by clicking **+ Add Shift** at the bottom of the section.
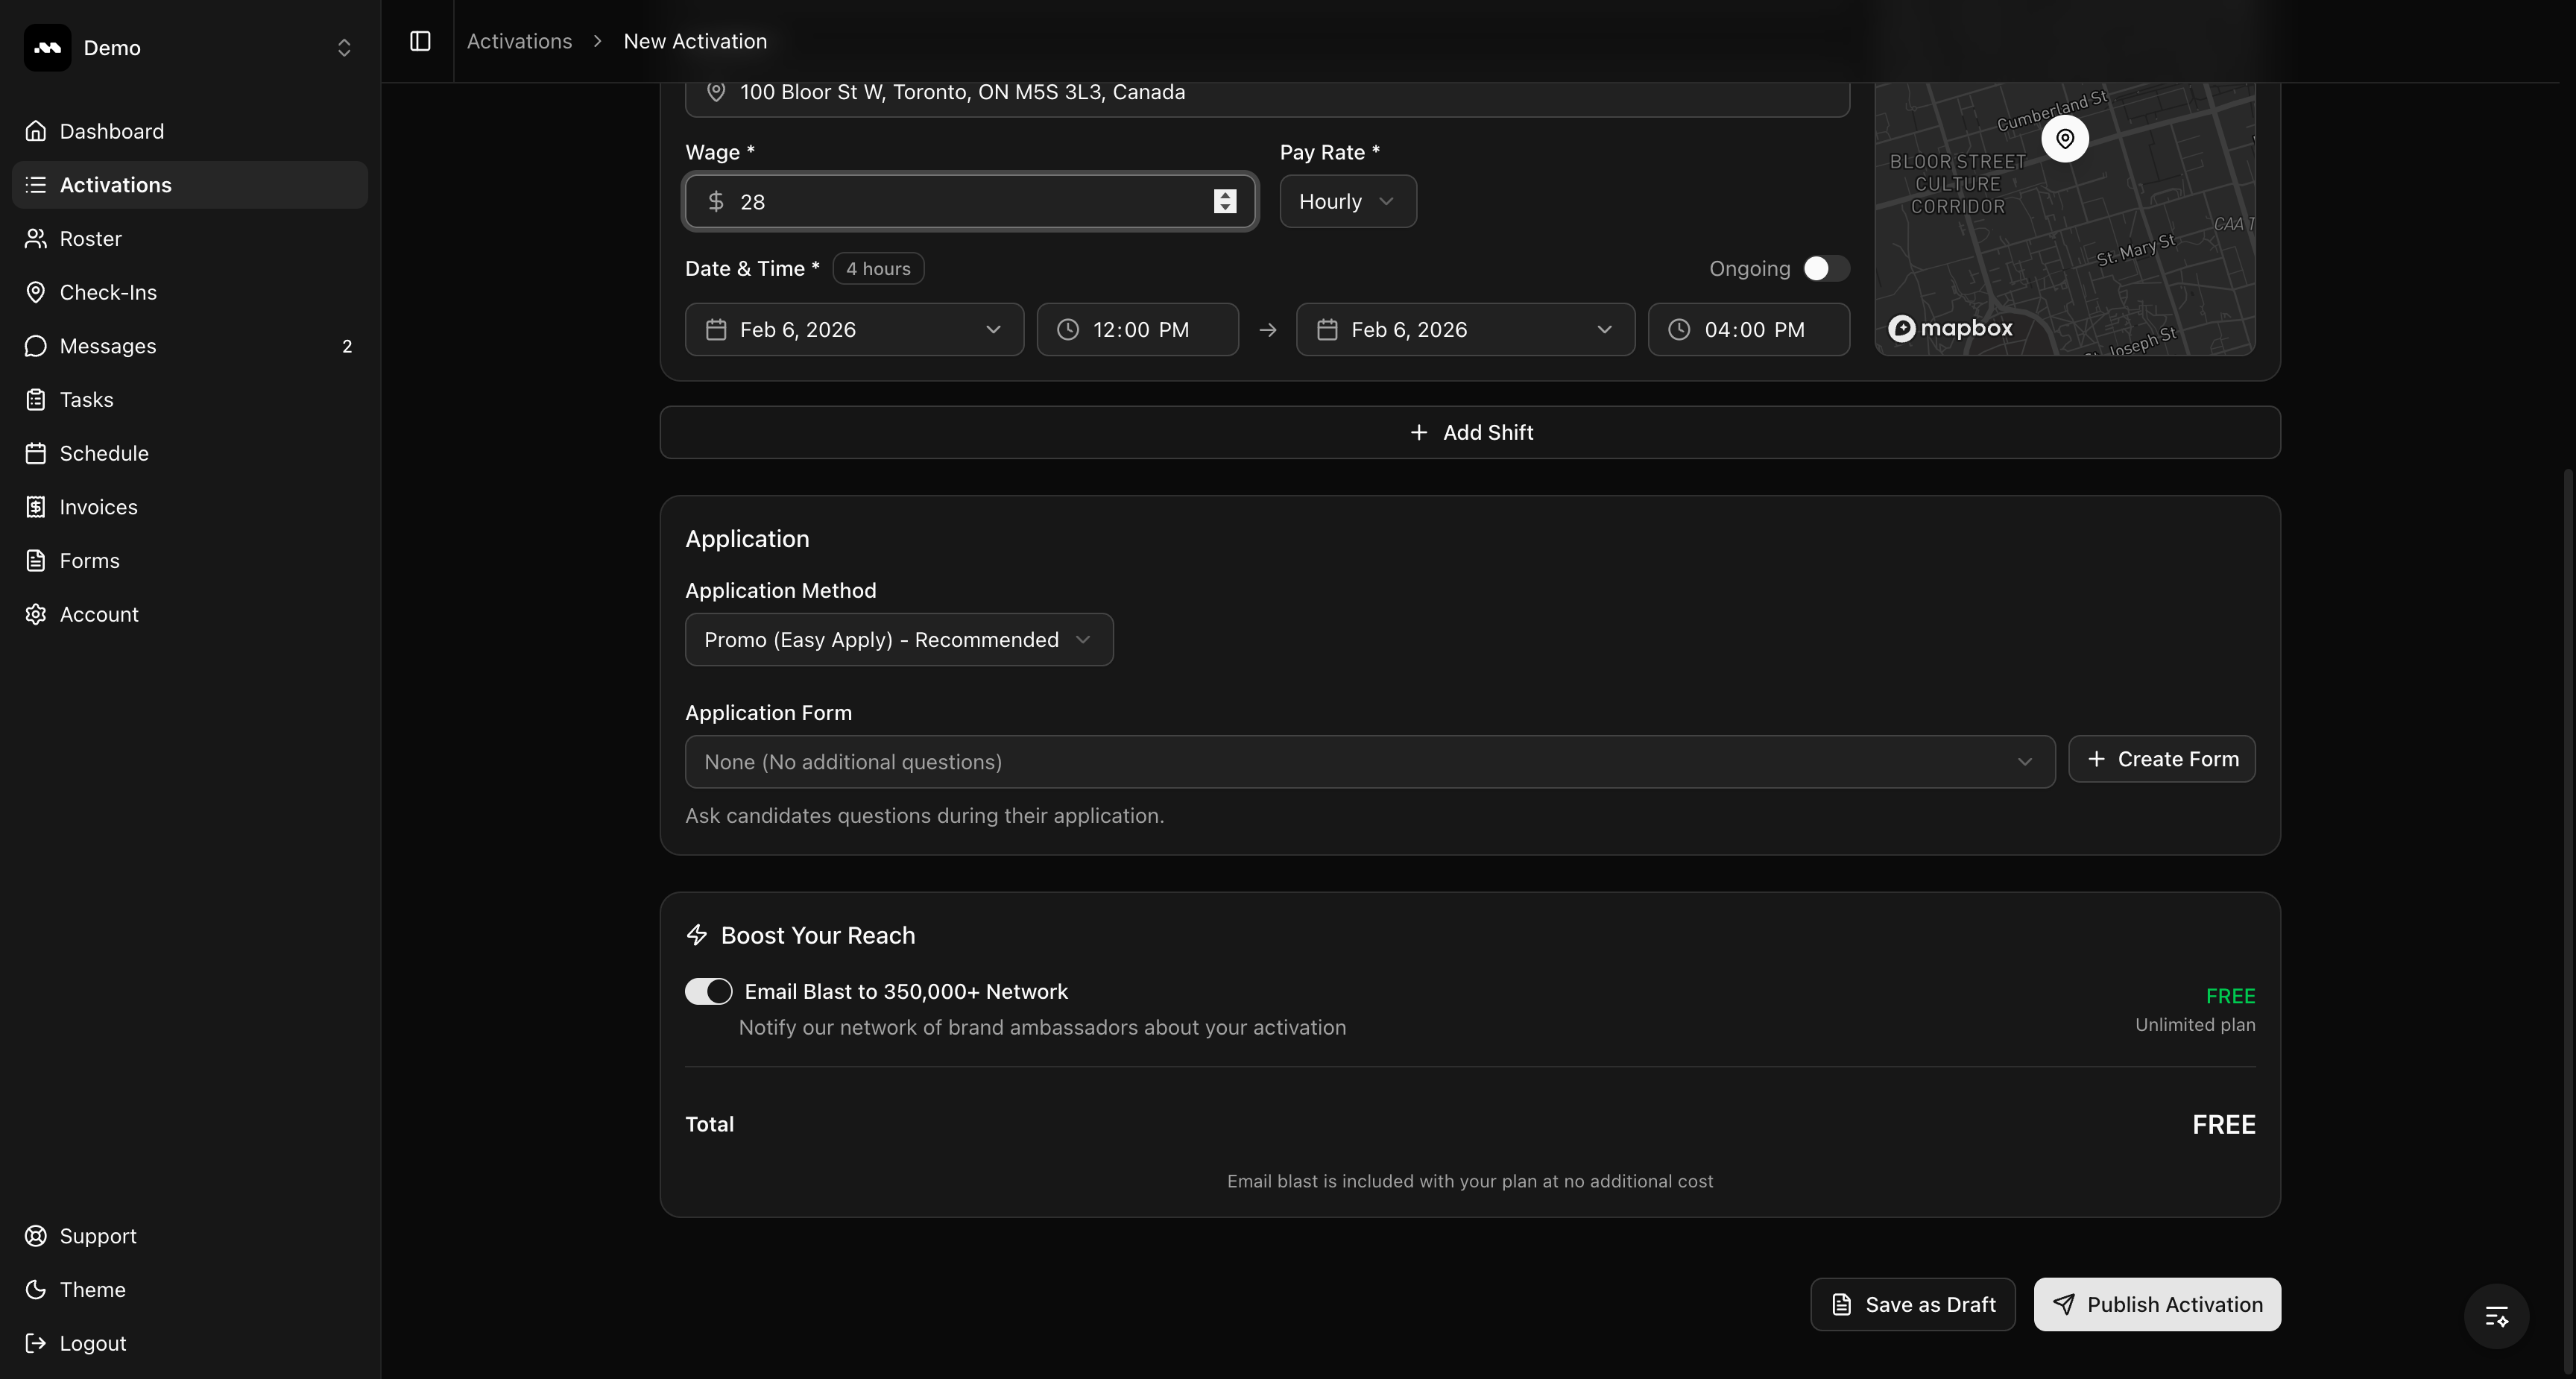
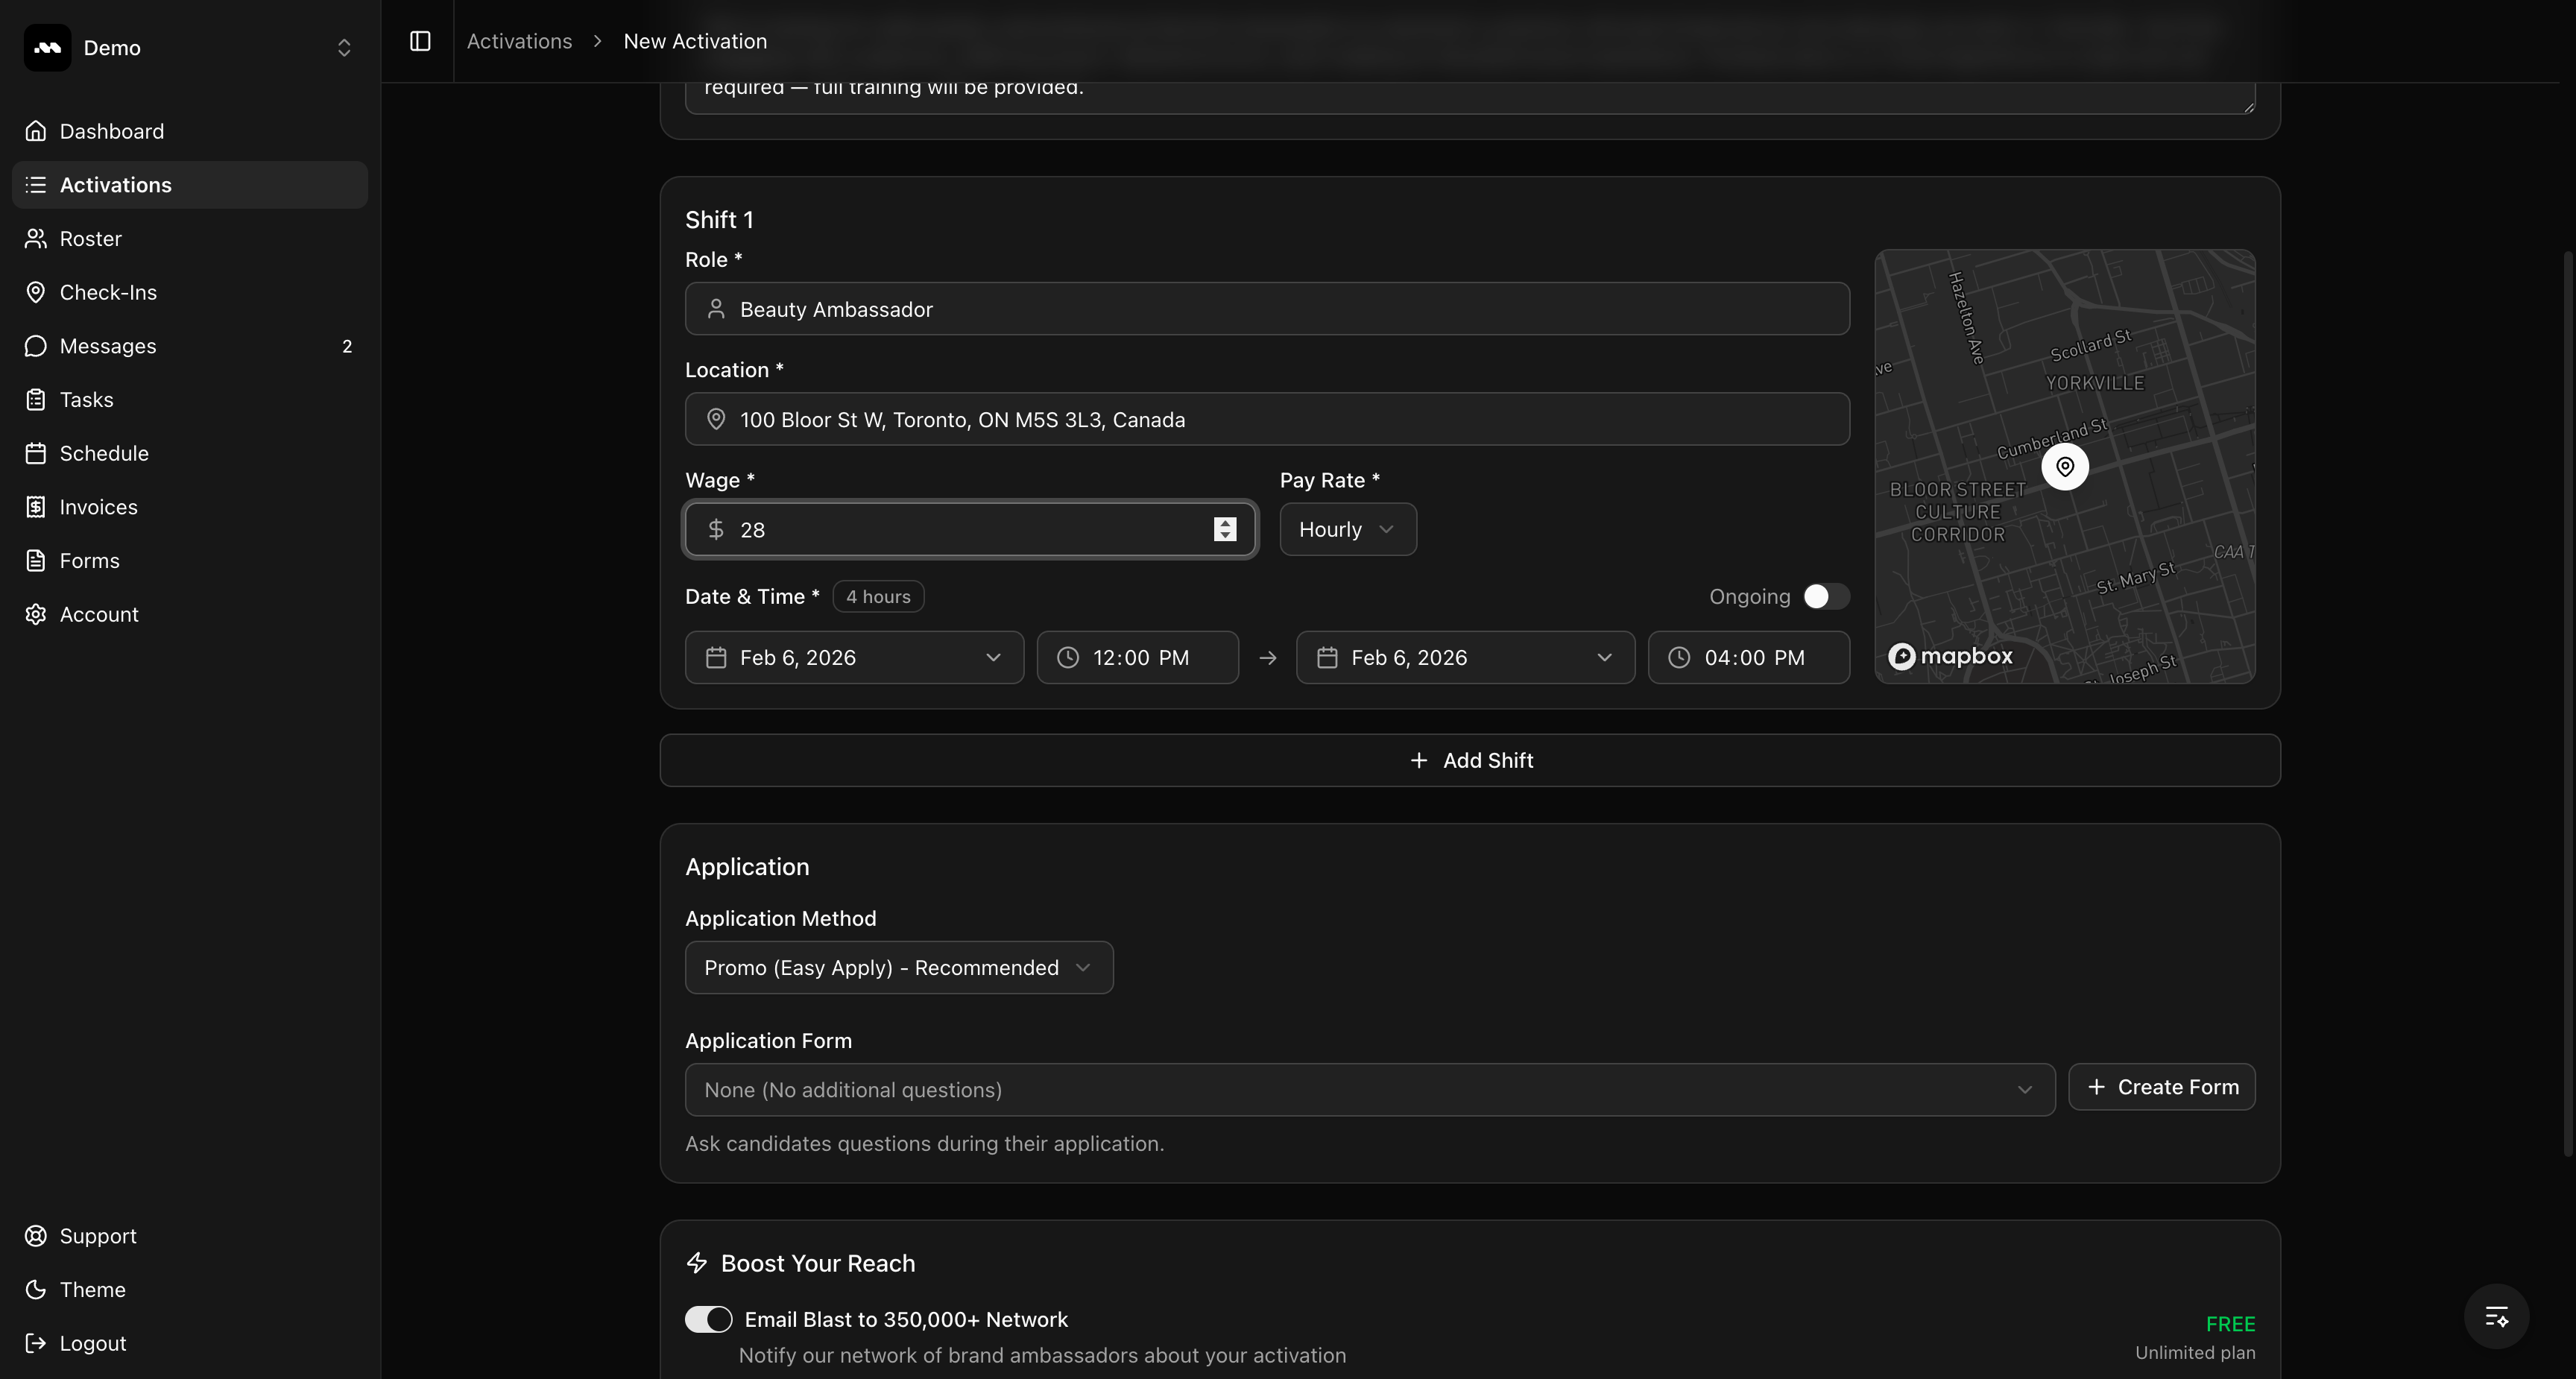 **Application Method** — Select how candidates apply:
* **Promo (Easy Apply)** — Candidates apply directly through the platform. You can optionally attach a custom application form with additional questions.
* **Email** — Candidates apply via email to an address you specify.
* **Link** — Candidates are directed to an external application URL.
**Boost Your Reach** — Toggle the **Email Blast** to notify the Promo network of 350,000+ brand ambassadors about your activation. Depending on your plan, this may be included for free.
When you're ready, click **Publish Activation** to make it live, or **Save as Draft** to come back to it later.
**Application Method** — Select how candidates apply:
* **Promo (Easy Apply)** — Candidates apply directly through the platform. You can optionally attach a custom application form with additional questions.
* **Email** — Candidates apply via email to an address you specify.
* **Link** — Candidates are directed to an external application URL.
**Boost Your Reach** — Toggle the **Email Blast** to notify the Promo network of 350,000+ brand ambassadors about your activation. Depending on your plan, this may be included for free.
When you're ready, click **Publish Activation** to make it live, or **Save as Draft** to come back to it later.
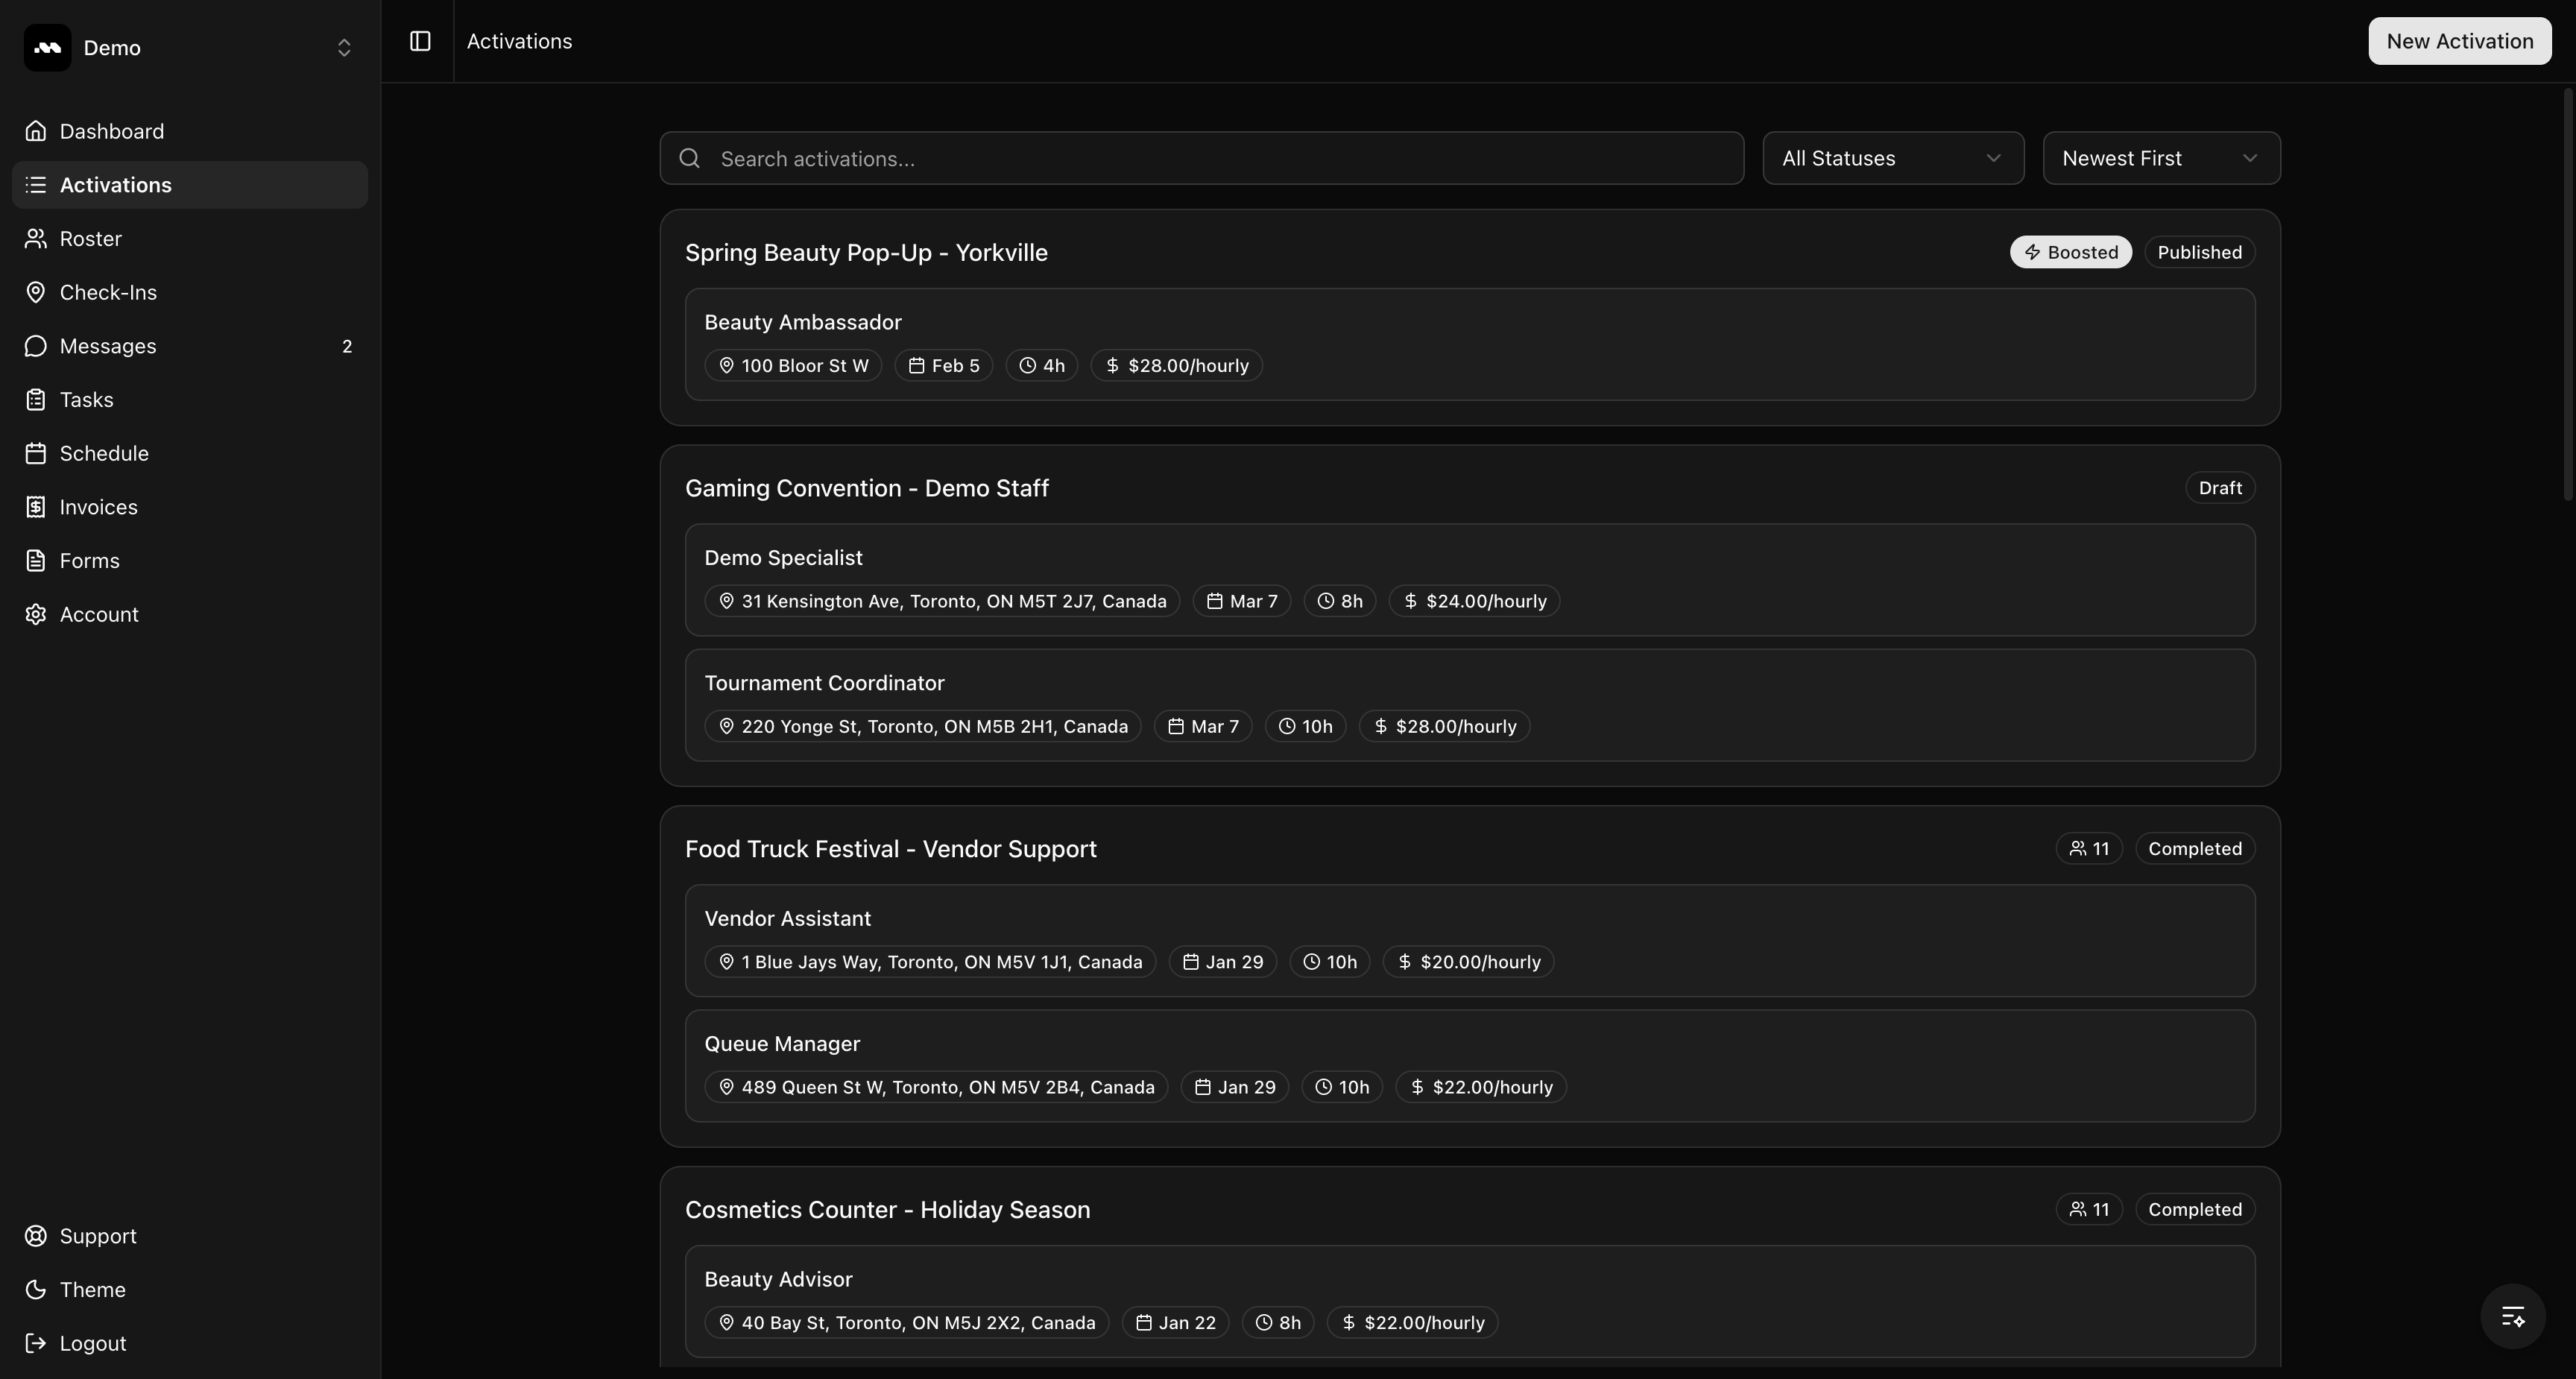
 After publishing, you'll be redirected to the Activations list. Your new activation appears at the top with a **Published** badge. If you enabled the email blast, you'll also see a **Boosted** badge.
Brand ambassadors can now find and apply to your activation.
After publishing, you'll be redirected to the Activations list. Your new activation appears at the top with a **Published** badge. If you enabled the email blast, you'll also see a **Boosted** badge.
Brand ambassadors can now find and apply to your activation.
 ## Tips
Use **Save as Draft** if you're not ready to publish yet. You can edit and publish drafts later from the activation detail page.
You can add multiple shifts to a single activation if the job spans different locations, dates, or roles.
Enabling the email blast significantly increases visibility, especially for time-sensitive activations.
## Tips
Use **Save as Draft** if you're not ready to publish yet. You can edit and publish drafts later from the activation detail page.
You can add multiple shifts to a single activation if the job spans different locations, dates, or roles.
Enabling the email blast significantly increases visibility, especially for time-sensitive activations.